Here we will tell you how to make a Photoshop animation burn fire in photoshop.
Read more...
[1] Finding a good image like this.

[2] Take the Text Tool select the Horizontal Type Mask Tool, download this font http://cooltext.com/Fonts-c


[3] Create a text.

[4] Make the new layer and fill the selection with White color.

[5] Now hide the Layer 1 click on the eye.

[6] Make the copy of the Background.

[7] Then Go to Edit>Transform>Wrap Adjust nodes as shown..

[8] Create three duplicates of this Burn layers. Repeat the above step and warp each layer differently.

[9] Now Unhide the Layer 1.


[10] Go to Window>Animation.

[11] And now Hide these layer do not hide these two layers.

[12] Now Duplicates Selected Frames, click on this icon.

[13] Now Hide this Layer and unhide the Next one.

[14] Now Duplicates Selected Frames, click on this icon.

[15] Now Hide this Layer and unhide the Next one.

[16] Use the same think to next layer now click on this icon to Play Animation.

[17] Save Optimised as, and it should look like this

photoshop cs2 animation
photoshop cs3 animation
photoshop create animation
This time you will learn how to make a self-writing text. See how it looks:
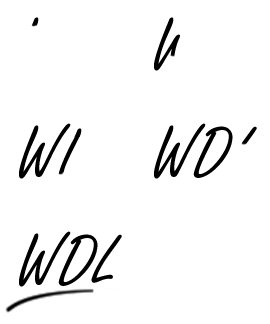
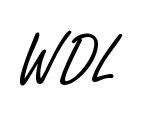
1. Start a new document 400x400. Select Type Tool (T) and write any text you want. In this tutorial we'll use a “WDL” text. Set the font family " Freestyle Script" or any font that looks like hand-writing, text size 72.
2. Select Pen Tool (P). In Shape Tools options choose Paths. Click where you want the path to begin. Then click where you want the path to end.
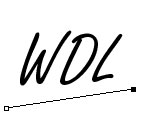
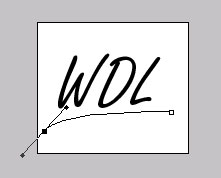
With the left mouse button held down, drag the points to make accentuation shape.
3. Select Brush Tool (B). Set Hard Round 3px Brush. Now go to Window>Brushes (F5) and use the following "Shape Dynamics" settings: Control: "Fade" 150. Create new layer (Ctrl+Shift+N). Select Pen Tool (P) again, right click on the shape and select Stroke Path... Use Brush to stroke. Repeat Stroke Path one more time.

Now it's time to switch to ImageReady (Ctrl+Shift+M)
The main idea is that in each frame you should delete almost whole image, leaving the already written lines. Each frame should contain a bit more image in comparison to the previous one, until the whole phrase is written… But let ' s do it step - by - step :
1. First you should prepare your workspace. In Layers Palette you should have something like this:
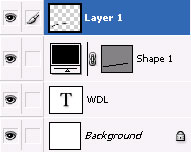
Select Shape 1 layer (left mouse click) and delete it (Layer>Delete Layer). Then select Layer 1 and merge it with WDL text layer (Layer>Merge Layers or Ctrl+E). Duplicate it (Layer>Duplicate Layer or Ctrl+J). Hide "WDL" layer (just click on the eye left to the layer).
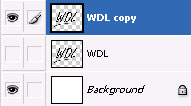
Call rulers (View>Rulers) and start adding lines (just drag ruler to the place you need). Add every 5 px horizontal rulers on the WDL text. This will show you writing stepping.
Open Animation Panel (Window>Animation)
2. Now everything is ready. The first frame should contain the beginning of the text. In our case it is the upper left part of the “W” letter. Select Eraser Tool (E) and erase everything, except the upper left part. In animation panel set frame delay time to 0.04. The first frame is ready.
3. Click the Duplicate Current Frame button on the Animation panel.
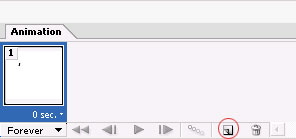
Now make invisible your top (WDL copy) layer. Duplicate WDL Layer and make this duplicate visible. Select this layer.
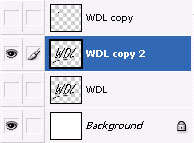
As in step 2, select Eraser Tool (E) and erase everything, except the upper left part, but now leave some more (remember about rulers - use them to measure how many you should erase).
4. Repeat step 3 until you see the frame which will contain all letters and underlining.
5. Make new empty frame. Then click on Tween in Animation panel and use the following settings:
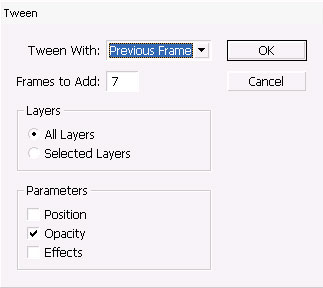
This is done to make your text disappear after it is written.
6. Now it's time to change the frame delay time. To make your animation look more realistic, you should change the delay time in some places. The biggest delay should be between your letters (about 0.35 ms). Also, you may set a small delay in the sharp curves of the letters (about 0.06 ms). The last frame should have the 0.6 ms delay .
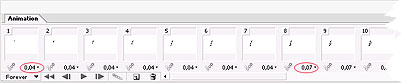 Click to enlarge |
7. That's it! You can use this effect for you signings, greetings and other – looks very impressive!
Read more...
Follow these guidelines to create the signature.
1. Make a signature and add a text-layer (Make sure the layer doesn't have any layer-style)
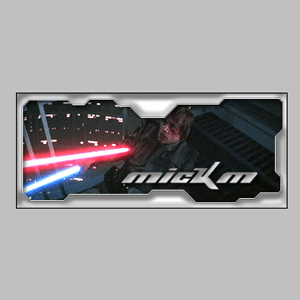
2. Create a new layer;
Grab your gradient-tool and set it to Reflected Gradient
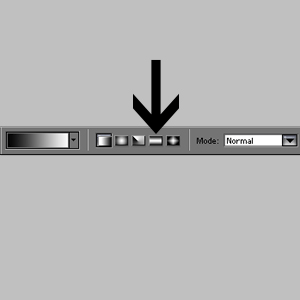
3. Create something like this and press: Ctrl+I
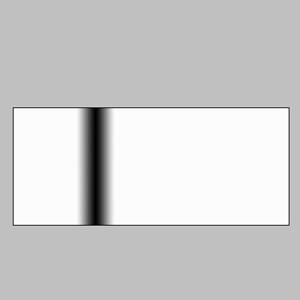
4. Press: Ctrl+U and set it to your favourite color;
Press Ctrl+G and set the blending option to "Lighten";
And press this button
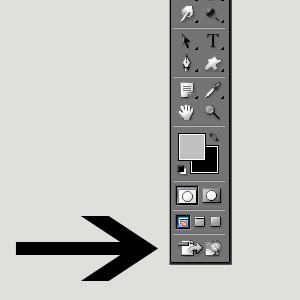
5. When in Image-Ready, select the gradient-layer;
Move it all the way out of the text so that you can't see it (left);
Press this button and select "New frame"
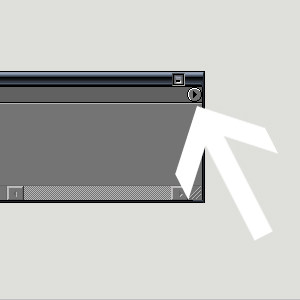
6. Press right until you see the gradient move to the other side of the text-area;
Press this button and select these options
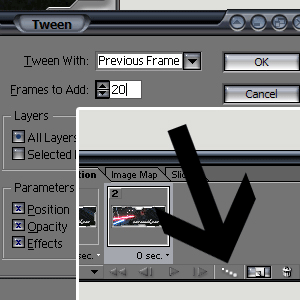
7. Save Optimised as, and it should look like this
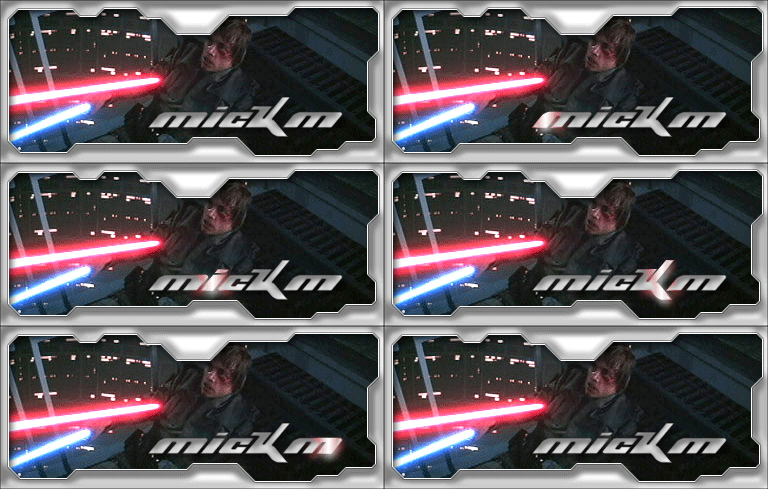
If you have a small video clip, then it's possible to import it into .Gif and use it as part of an animated banner or as a stand-alone cool signature.
This tutorial will work in Image Ready 7.0 or higher. Note that Image Ready CS compresses the .gif to a smaller file size (almost 3x smaller) than Image Ready 7.0.
1. Open Adobe Image Ready.
2. Prepare the video clip in .mov format.
3. Click File > Open...(Ctrl+O) and select your video clip in .mov format. (I used the preview to Star Wars episode III).
The following dialog box will open: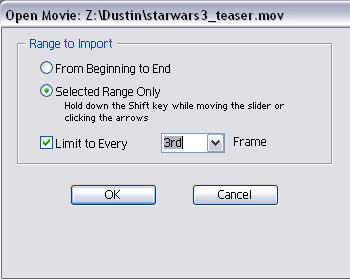
Select the option you need (from the beginning to end uses the whole movie, selected range is only a part). And don't forget to limit frames to decrease size of .gif file (the larger the font size, the smaller the frame will be, and accordingly the poorer the quality and the smaller the size).
4. The next step is to set the timing of your video clip. Image Ready normally sets it too fast. So we have to decrease it. Simply select all frames in your animation window by clicking the first frame, holding shift and clicking the last frame and then click on the timing. Set it at about 0.12.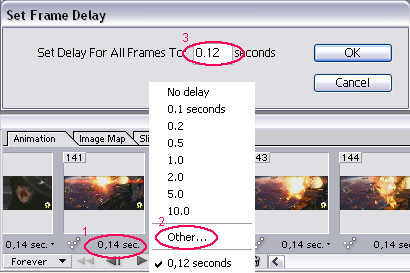
5. Check to see if your animation runs smooth in Internet explorer IE (Ctrl+Alt+P).
6. Now it's time to change the movie to the needed size and set its necessary rotation. Link all layers (if you check all the boxes you will be able to see the target near small pictures in layers palette).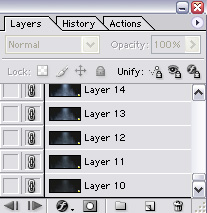
Now use Edit > free Transform (Ctrl+T) on any of layers and set desirable size (when resizing, hold down Shift button to save aspect ratio).
7. Now save the result (File > Save Optimized)
You can also add decoration and paste the movie as a frame in the picture. Se what i've done: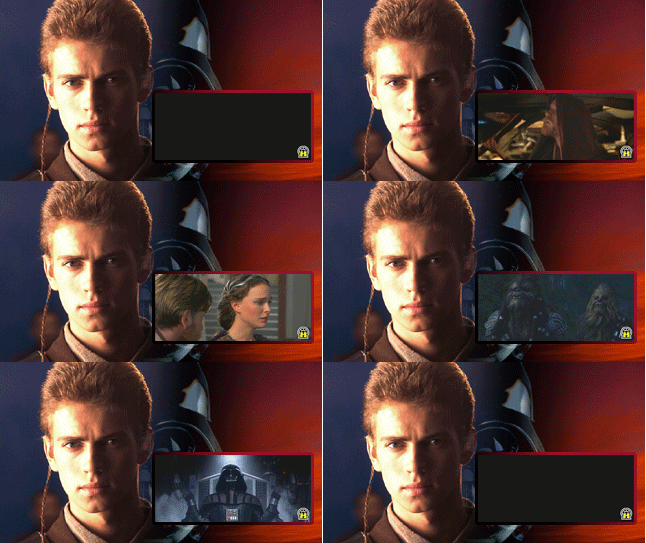
Read more...
Have you ever had the desire to create a cool signature on a forum, an animated banner, or just something that moves? Here I will tell you how to create an inscription, giving you skills that will serve as the foundation for further experimentation. You can create such things with Adobe Photoshop and Adobe ImageReady. My tutorial will show you how to do something like this:
This tutorial consists of two parts: Photoshop and Image Ready.
Part1:
1. Open Photoshop .2. Create a new document having the size of 750x50 (pixels).
3. Select Type Tool
 (T). Set size 16xp, font size - Comic Sans MS, font style – Bold, font color - #FE5858.
4. Type the text: “Pink elephants are frolicking about the room... running and leaping, the pigs are happy.”
5. Duplicate the layer twice (Layer > Duplicate Layer…). Rename the created layers something like "1" and "2".
6. Rasterize "1" and "2" layers (click on "1" layer and then Layer > Rasterize Layer > Layer. After which you should repeat the same procedure with "2" layer)
7. Now hide each layer except "1". (click on the eye near the layers you wish to hide) After that select "1" layer (left button click on it).
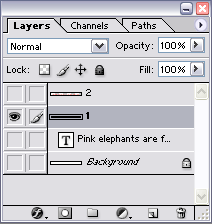
8. Select Rectangular Marquee Tool
 (M).
(M).9. Now with the help of this tool, while pressing and holding shift, select the letters in the text (the length and width selected for every letter is insignificant – the most important thing is to ensure that you have completely highlighted the letters). You should choose letters, including all spaces, having from 2 to 5 symbols, but in such way that the intervals are various.
10. Select Move Tool
 (V) and drag the chosen section about 7-10 pixels upwards.
 11. Deselect by pressing ctrl +D. Now you may have something like that:

12. Now unhide and select "2" layer (click on the eye near the layer, then on the layer itself) and select the letters as described in the ninth point, but with the exception that you should not chose the very same letters, and preferably in a way such that the main portion of the letters was neighboring the previous ones in the previous layer.)
13. Select Move Tool (V) and drag the chosen portion about 7-10 pixels upwards.
14. Deselect by pressing ctrl +D. Now you may have something like that:

Now it is time to move on to the ImageReady parts.
Part2
1. Open ImageReady (click Jump to ImageReady or press Ctrl+Shift+M).
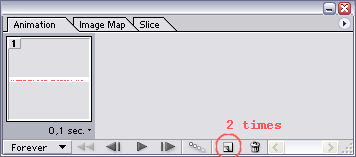
 2. In the Animation panel (if you cannot see such panel, then go to Window > Animation) duplicate the first frame twice (double-click on Duplicate Current Frame 2 times)
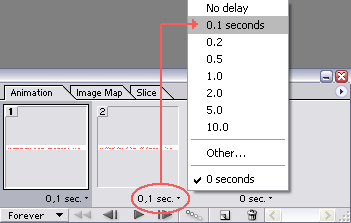
3. Set a delay of 0.1 seconds between the frames.(under the described frame click on the drop down menu, where you will choose 0,1)
4. Choose the first frame. Make only the layer with the original text visible.
5. Choose the second frame. Make only "1" layer visible.
6. Choose the third frame . Make only "2" layer visible .
7. You can test your results by clicking on Play/Stop animation on animation panel.
That's all there is to it. All that remains to be done is to save the picture - File > Save Optimized as…. (Ctrl+Alt+Shift+S), give it a name and push Save.
I hope this tutorial was helpful for you and helped you better understand how to work with animated figures (and Pink Elephants ).
).
By Dustin Kein
Free Domain
