If you have a small video clip, then it's possible to import it into .Gif and use it as part of an animated banner or as a stand-alone cool signature.
This tutorial will work in Image Ready 7.0 or higher. Note that Image Ready CS compresses the .gif to a smaller file size (almost 3x smaller) than Image Ready 7.0.
1. Open Adobe Image Ready.
2. Prepare the video clip in .mov format.
3. Click File > Open...(Ctrl+O) and select your video clip in .mov format. (I used the preview to Star Wars episode III).
The following dialog box will open: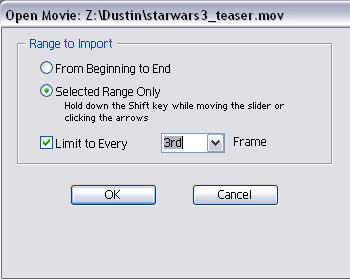
Select the option you need (from the beginning to end uses the whole movie, selected range is only a part). And don't forget to limit frames to decrease size of .gif file (the larger the font size, the smaller the frame will be, and accordingly the poorer the quality and the smaller the size).
4. The next step is to set the timing of your video clip. Image Ready normally sets it too fast. So we have to decrease it. Simply select all frames in your animation window by clicking the first frame, holding shift and clicking the last frame and then click on the timing. Set it at about 0.12.
5. Check to see if your animation runs smooth in Internet explorer IE (Ctrl+Alt+P).
6. Now it's time to change the movie to the needed size and set its necessary rotation. Link all layers (if you check all the boxes you will be able to see the target near small pictures in layers palette).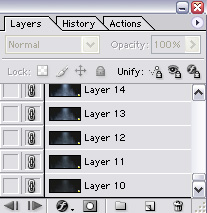
Now use Edit > free Transform (Ctrl+T) on any of layers and set desirable size (when resizing, hold down Shift button to save aspect ratio).
7. Now save the result (File > Save Optimized)
You can also add decoration and paste the movie as a frame in the picture. Se what i've done: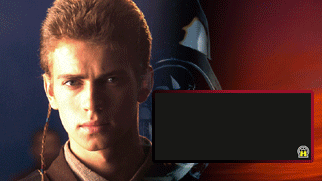
This entry was posted
on 29 May 2008
at Thursday, May 29, 2008
and is filed under
Animations,
Photoshop
. You can follow any responses to this entry through the
comments feed
.
Recent Posts
Recent Comments
Sponsored Links
Free Domain
